
Drywall Repair Las Vegas is one of the most satisfying home improvement tasks. Whether you’re a serial renter or a bona fide homeowner, knowing how to patch drywall can save you money and frustration.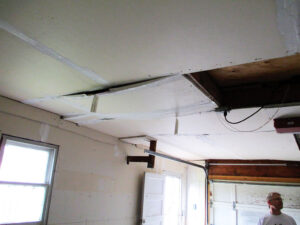
For nail holes and smaller cracks, all you need is drywall spackle and a little patience. Larger holes and cracks require a bit more work but are still manageable for even a reluctant DIYer.
Moisture is a big issue for drywall repair because once it gets in, it starts spreading and impacting other parts of the structure. Even if they seem small at first, wet spots on the surface can cause mold and mildew that will eventually damage other materials in the home. If left unchecked, the spores can even spread to the wood framing in the walls and cause severe problems.
If drywall is wet, it needs to be repaired as soon as possible. The first step is to find the source of the problem and fix it. Then, the drywall will need to fully dry out to limit further damage. This is typically done with area fans, dehumidifiers, and by opening up doors and windows in the room. It can take up to three days for a wall to completely dry out.
A penetrating moisture meter can be used to test the drywall for moisture, but it’s also important to use a visual inspection to spot moisture problems in a wall. Look for signs of sagging or bulging, which will indicate that the drywall has been saturated with water and may be starting to break down and decay.
In addition, a musty smell is usually the first sign of a mold infestation. This odor is caused by the spores of mold and mildew that thrive in wet drywall. Mold can also eat away at the drywall and wooden structures in the walls, making them weak and unstable.
Once a professional is hired to handle drywall repairs, they will remove any damaged areas of the wall and replace them. They will then install new drywall and put up furring strips to hold the new drywall in place. They will then use joint compound to fill in the seams and sand them smooth. Once it is dry, the drywall will be primed and painted, making the patch virtually undetectable. In many cases, a full drywall installation can be finished in just one day by a professional. It is always best to call in a professional for any type of drywall repair, especially in the event of a flooded basement.
Holes
Most homeowners will have to deal with holes in their drywall at some point. They can happen for a variety of reasons, including hanging a picture or artwork that loses its nail, kids swinging a doorknob with too much force, and even when furniture is moved around the house. The good news is that holes in drywall are fairly easy to fix if you have the right tools and know-how.
The first thing you will want to do is clean the hole and remove any loose debris. Then, measure the size of the hole to determine what kind of patch you will need. It is best to get a patch that is a bit larger than the hole so you can cut it down to size before applying it. Then, you will want to prep the patch by sanding it down and cleaning away any dirt or debris that is on it.
Next, you will want to apply a thin coat of joint compound over the entire surface area of the patch. This will help hide any bumps or unevenness and make the patch look a lot more seamless than just painting over the hole. Then, let it dry completely before you apply another coat of skim compound and sand it down again. After this, you will want to prime the area and then paint it to match the rest of the wall.
If you have a medium or large hole, the process will be slightly more complicated, but it is still something that most do-it-yourselfers can manage with the proper preparation and application. It is important to remember that you will also need to address the texture of the patched area. This can be challenging, but it is essential to ensuring that the patch is undetectable.
For small holes, you will need spackle or joint compound, a putty knife, and a sanding block. For medium or large holes, you will also need some mesh drywall tape to reinforce and hold the drywall mud in place. For large holes, you may need to replace the whole section of drywall.
Cracks
A drywall crack may appear for a variety of reasons. It could be an indication of structural damage or a simple matter of seasonal changes in temperature and humidity. It’s important to address the cause of the crack in order to prevent it from worsening or reoccurring.
Cracks that run parallel to the seam between two drywall panels are usually easy to repair. A simple spackling job should take care of this type of problem. However, cracks that extend vertically or horizontally from the seam are an indicator of a more serious problem. These cracks are likely to lengthen and widen over time if left untreated, so they require more thorough attention.
If a crack runs across the width of the wall, it may indicate a foundation problem that needs professional intervention. This is especially true if the crack accompanies sagging or bowing walls. Houses that are built on loose clay soil often shift in dramatic ways. When this happens, the foundation sinks into the clay and begins to absorb rainwater until it becomes saturated. The resulting shifts in the foundation may lead to a large number of hairline cracks that appear throughout the home.
It’s possible that a crack was caused by a water leak that penetrated through the drywall and softened the sheeting. The resulting expansion and contraction of the drywall can lead to a widening and lengthening of the crack. It is essential to fix the source of the leak in order to stop it from reoccurring and damaging the drywall and the foundation.
When a crack is found in the seam between two drywall sheets, it’s important to determine whether or not it extends through the paper tape that covers the seam. If it does, the crack should be trimmed using a utility knife or paint scraper. After the crack is widened, a quick-setting drywall filler like Durabond should be applied to the area. After the compound is dry, a strip of drywall tape should be placed along the seam and carefully pressed into the joint. Lightly sand the entire area and then repaint it.
Taping
Drywall is inexpensive and easy to hang, drill into, finish, and paint. It’s not indestructible, however, and holes can appear fairly easily. Small dents, left from picture hooks, for example, can be repaired with drywall patch kits and a little joint compound. Larger holes are usually patched with a piece of fresh drywall that’s cut to fit into the damaged area and secured with drywall plaster. It’s important to remove any stray surface paper or gypsum from the edges of the patch before applying the plaster, as it will not be covered with the drywall compound.
Most drywall damage occurs around corners and inside wall edges, where the seams between sheets meet. Normally, the seams are concealed behind several layers of paper, drywall tape, and mud or joint compound. But as time goes on, the tape can pull loose or peel off completely, especially in bathrooms and basements where the walls are exposed to high humidity. It’s best to use moisture-resistant drywall tape on any repairs in these areas.
Hairline cracks are another common problem with drywall, caused by lumber shrinkage and the shifting of house frames over time. These cracks can be difficult to repair, but it’s essential to do so if you want to avoid further problems. To begin, vacuum the crack to remove any dust or debris. Then, apply a thin coat of joint compound using a narrow putty knife and let it dry. Next, sand the surface of the compound to smooth it, and apply a second coat.
Outside corners of rooms are often dented or cracked due to furniture moving and settling, doorknobs dinging, or simply from bumping into the wall over time. These can be repaired by filling the crack or dent with a drywall patch kit, sanding it to smooth the edge, and then applying two more coats of drywall compound. Once it dries, sand again and paint as needed. If you’re not sure how to approach a specific drywall repair, contact a professional contractor. A qualified professional will be able to fix the problem quickly and efficiently, saving you time and money.